Hi, my name is Cathy Kelly! When I was introduced to sea glass I didn't know that it would become such a passion for me. Whether it's walking on a beach or wading in a river searching for sea glass and pottery, creating jewelry and crafts, searching out the history of a piece of glass or pottery, or marketing and selling online and at craft fairs, I enjoy every aspect to it's fullest.
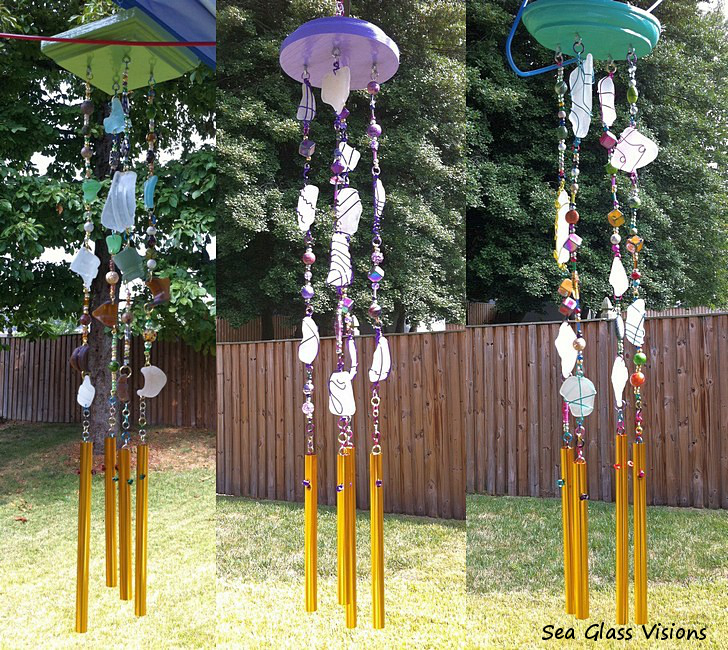
There aren’t many things I enjoy more than “playing” with sea glass. One of my newest creations is sea glass wind chimes. Even though they were a bit of a challenge at first, I have enjoyed creating them and they have been a big hit with my customers. I have sold them at the last two craft fairs I attended. At the first fair which was outside, a lovely breeze was a big help in getting them a lot of attention, they sound beautiful!
These beaded and wire wrapped sea glass wind chimes are a fun way for me to use what is called “craft” glass. (Hmmm, I think that grades of sea glass will be a topic for another post.) Let’s just say that this craft glass isn’t the best for jewelry, it’s not as nicely smoothed or frosted as jewelry quality, but it’s still nice glass.
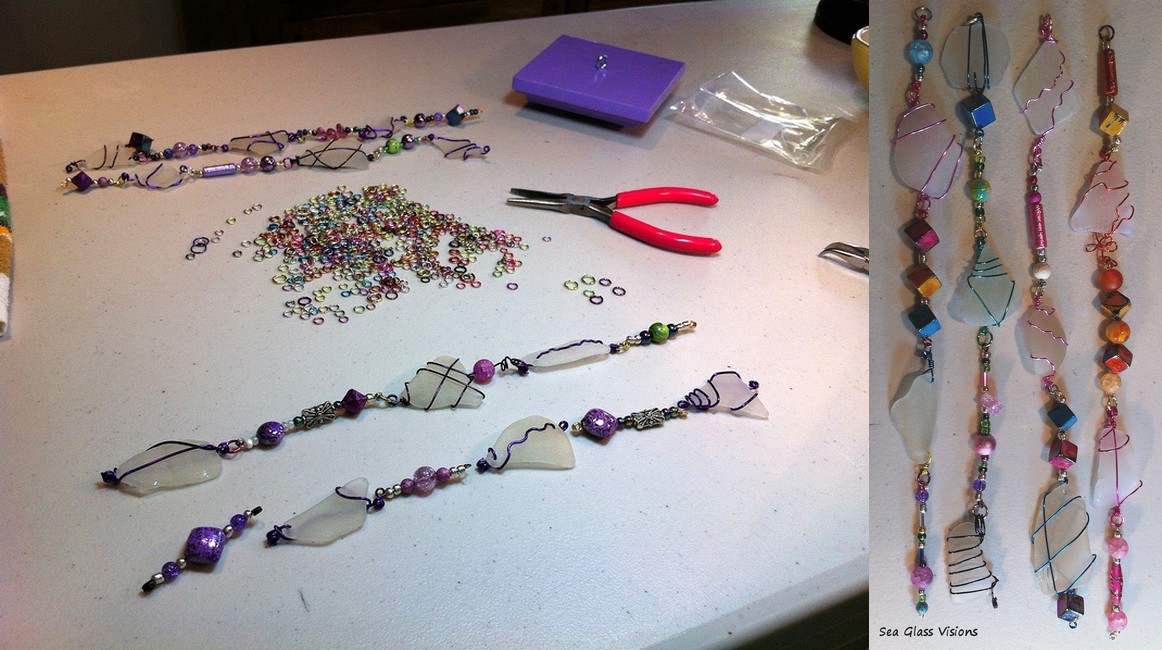
Very important components of all the wind chimes I create is colorful beading and color coordinated jump rings.
The first sea glass wind chimes I created were with frosted white sea glass wrapped with multi colored wire with multi colored beaded sections and multi colored jump rings. They sold out at the second craft fair I displayed them at. I have also created sea glass wind chimes using bottle necks and rims in different colors, white, brown, green and blue. These have been very popular, especially with sea glass aficionados who know that sea glass rims are a rarity.
Living in Maryland, the next logical color was purple, of course…
I always enjoy and am honored to create a custom piece and one sea glass wind chime I created was pink. It was white sea glass wrapped with pink and fuschia wire with sections of glitzy pink and pearl beads and coordinating pink jump rings. This had been ordered by a sea glass loving Mother for her daughter, who was just weeks away from the birth of her baby girl. A VERY special sea glass wind chime indeed!
If you are interested in a sea glass wind chime please contact me. I can create them in a wide variety of colors and color combinations.
This is a picture of the wind chimes being created, the one on the left is purple, and the pic shows the purple suspension top, the one on the right is multi-colored and had a turquoise suspension top.
One of the hardest things I had to learn when I started creating sea glass jewelry was how to measure to make sure that the findings I was purchasing were the right size, especially when ordering on line and especially when purchasing items like sterling silver chains and bails. I have to admit that I made a few boo-boo’s at first.
The worst was some pinch bails I ordered online that ended up being so small that not only would they never work with any of my sea glass, they were so small that I could not have worked with them at all. I think they are supposed to be used to create earrings. Ok, lesson learned.
I love creating with sea glass, but, of course you know that already. I am very glad that someone introduced me to it and I am very very lucky that I can enjoy time searching for it and creating with it. I am enjoying every aspect of this “hobby/business”.
I felt very strongly the best way to show my gratitude was to “pay it forward” and help others. That is why I decided to pick a charity to support with my jewelry. Because I am a cat lover, and because of the help they gave to me and my Mom, the charity I chose is No Kill Harford.
Someone asked me the other day what the most important tool on my workbench was. I laughed and said “my brain” then I said “my hands”. No she said, she meant an actual tool. That took a little bit of thought. I have many different tools, wire cutters, many different types of pliers, curved, flat and round nose, a few pairs with plastic heads, several pair of crimpers, a bead reamer, as well as a few tools that I’m not even sure of the name of. Some I use many times a day, some not as often.
According to Wikipedia a catchphrase (or catch-phrase) is “a phrase or expression recognized by its repeated utterance”. It seems that I have my own catchphrase now! This one has to do with craft fairs, more specifically, getting ready for craft fairs. It’s a simple one and will probably be recognized by lots of my fellow crafters. “One more day.” That’s it. “One more day.”
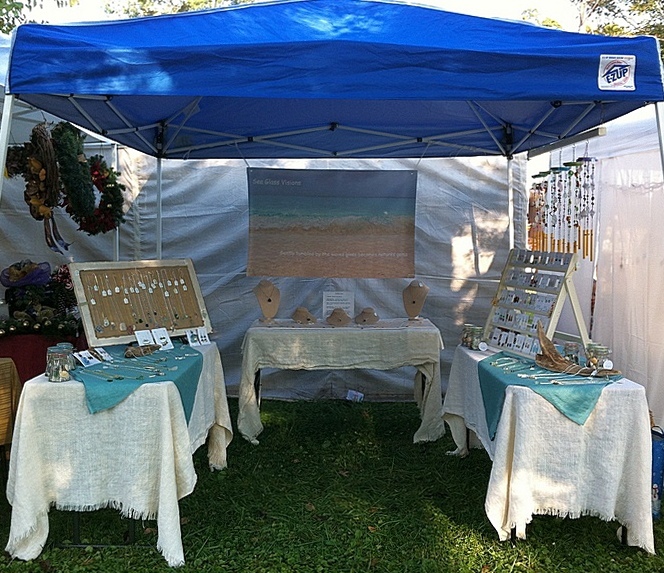
This has been a very busy Fall craft fair season for me. I showed at two craft fairs on two consecutive Saturdays. I was VERY lucky to have great weather for both of these outdoor craft fairs.
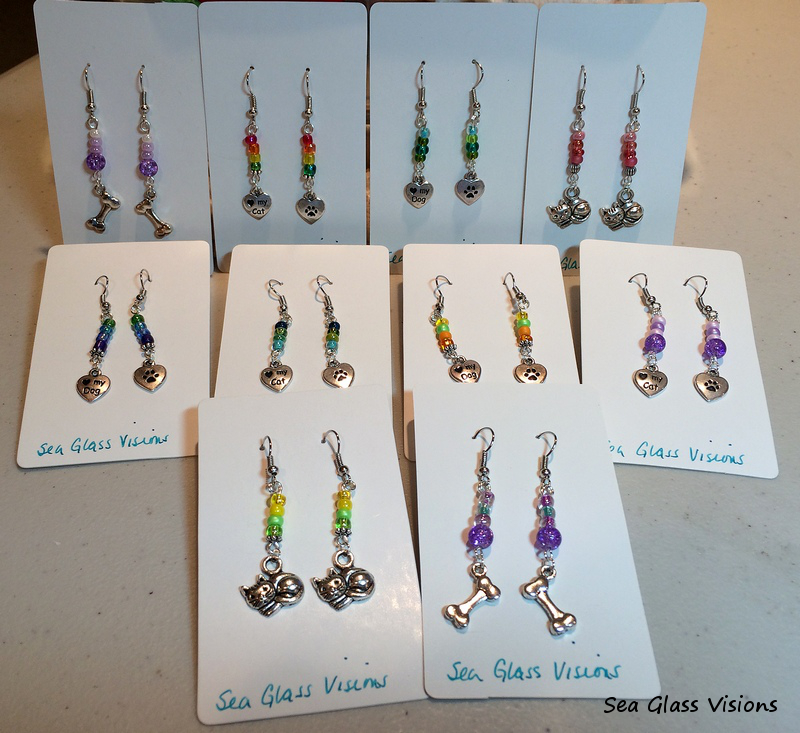
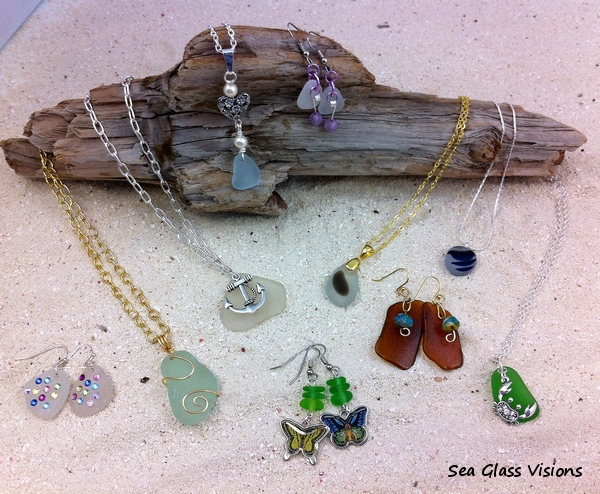
Just today, on the third Saturday, I fulfilled a consignment for a local artisan shop with 14 pieces of jewelry and shipped a custom jewelry piece. Some of the consigned jewelry pieces are in the photo below.
Things have been very busy for me. I just got home from a local craft fair, exhausted but happy. I have another craft fair next weekend, then a one week break and then another craft show. I consign in a local shop and will be re-stocking with new jewelry in two weeks. In November I have two consignments (possibly three) to complete for shops in Vermont. I want to stock up my etsy shop for the holildays. Life is good! I love to be busy and I enjoy nothing more than being at my workbench “playing”.
Needless to say, I’ve been making a lot of new jewelry pieces over the past month or two. I am also stepping away from creating just jewelry and have created two new sea glass crafts. I also made new displays for my booth and added a new table, increasing my jewelry and craft display.
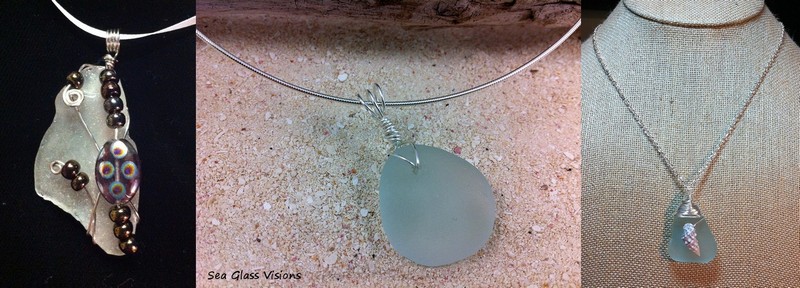
While all this has been going on I have been thinking about how all this got started and how much my style has developed along the way. While I still like to use a bit of beading and wiring when creating jewelry, my style is much more classic. My style has been called “simple elegance”.
A few months ago I came across pictures of the first piece of seaglass jewelry I created. Not pretty. It was a piece of local found sea glass, not a great piece with somewhat rough edges. I covered it with beads and wire. The other two photos below are more recent sea glass jewelry pieces created with marvelous English sea glass.
Since I have been collecting sea glass my favorite pieces are those that have embossing on them that help me to identify what their origin is. I have lots of them. On some the embossing is still very clear, on some not so much.
That was how it was with one of the last pieces I found, the embossing was very worn down. I could make out the word “bottle” but just couldn’t make out the line above
it. I tried looking at it under different lights, I tried wetting the piece and leaving it dry. Still no good.
I have been getting ready for three upcoming craft fairs as well as three consignments. I have been creating lots of beautiful sea glass and sea pottery jewelry, pendants and necklaces, earrings, bracelets and anklets. I have around 125 pieces completed and about 40 near completion, most waiting for necklaces. I am also trying to add two new types of sea glass crafts. One is a wind chime, the other is a sea glass frame. Oh, did I mention I want to add Christmas ornaments too? So make that three new crafts. I also have a facebook page and an etsy shop along with this blog.
There are lots of great videos online that show you the basics of drilling sea glass, but nothing teaches you quite like experience. Time spent drilling is what helps us each find the way that is most comfortable for us.
I have drilled thousands of pieces of sea glass over the past twelve years to create my sea glass snowflakes and my sea glass jewelry. I always take care with each and every piece.
How to drill sea glass
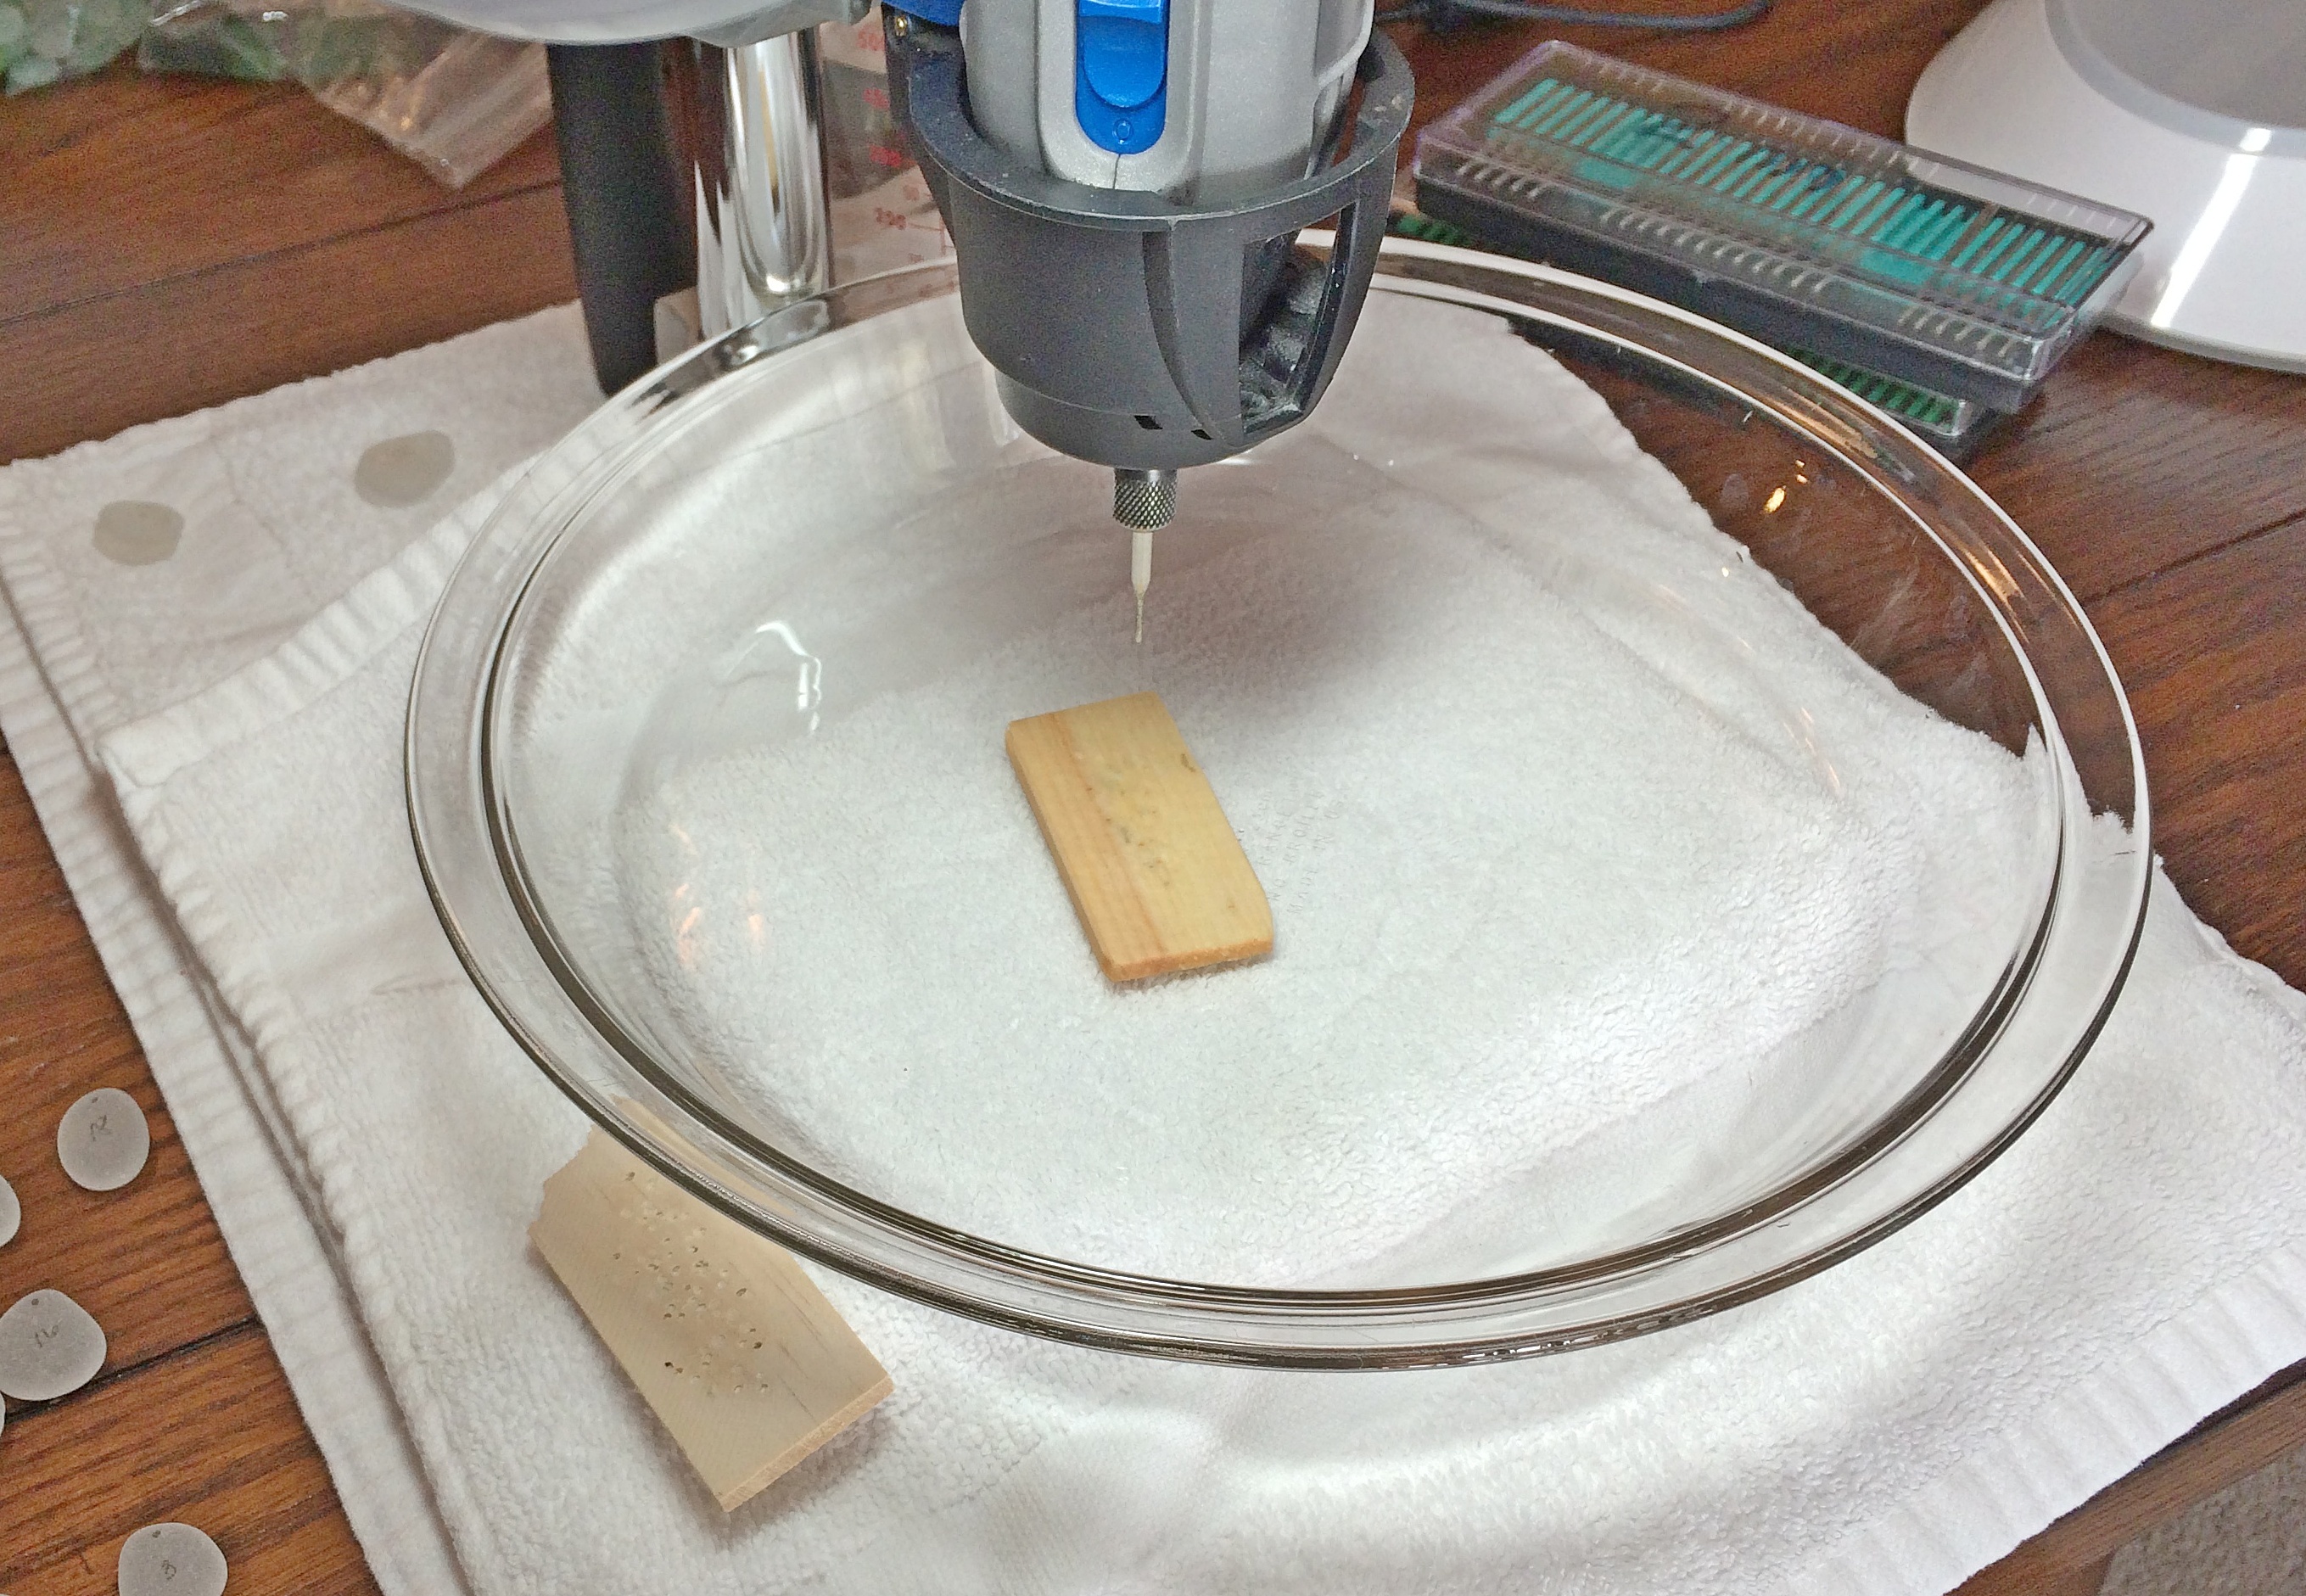
I use a Dremel 4000 drill on a Dremel 220 Workstation (drill press). I can’t imagine drilling without a press. It’s easy to maintain light even pressure with a press and keep your hole straight, which is very important because you are going to be drilling half way through your glass and turning it over to finish the hole from the other side.
As you see from the picture of my drill and press I have a lot of light at my drill station. I use a a shallow clear pyrex dish to drill in which allows the maximum amount of light around the glass and white cloths under the dish to reflect more light.
I have found a paint stir stick to be perfect support for the glass. If I have a piece of sea glass that is a bit rounded that doesn’t sit flat I figure out the best way to firmly seat it against the wood so it’s secure before I drill. Sometimes this means that it’s halfway on and halfway off the wood, but the area I am drilling always sits firmly on the wood.
You may think you don’t need a drill press if you are only drilling very thin sea glass, but even thin sea glass can be a challenge to drill. I have found that some of the thin brown sea glass I find locally can be very challenging to drill because of the density of the glass.
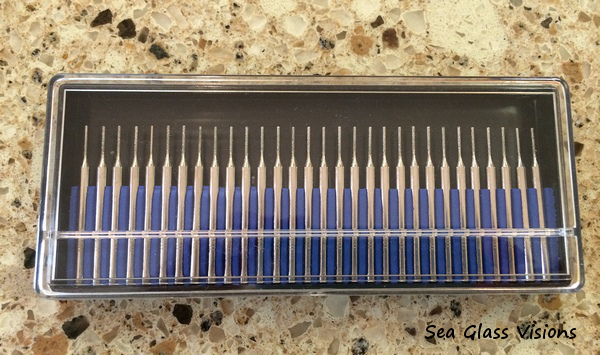
The next item of importance is the drill bit. You will need to use a diamond bit for glass. If you are like me and buy some of the pieces of sea glass you will be drilling the last thing you want to do is ruin your investment due to a cheap or dull bit. A quality drill bit is your best friend. I’d suggest you spend a bit of money and buy quality bits from sellers like RioGrande, especially if you’re just starting out.
Avoid the 30 bit sets you see for cheap on Amazon. I used them in the past and always found 8 to 10 of them did not work at all or did not drill many pieces before becoming dull because they have a very thin diamond coating. It’s difficult learning how to drill and a low quality bit will only make it harder.
My favorite type of bit is a diamond twist drill and I use a 1.4 mm for most of my drilling as 20 gauge wire fits through it easily. I purchase them thru RioGrande.
ALWAYS WEAR EYE PROTECTION.
In order to help keep the glass cool and the dust down you need to drill the glass under water. The water doesn’t have to be deep, as I have learned deep water can alter the view of the glass. The glass needs to be covered. Place your fingers comfortably on the glass to hold it down while you drill. You will need to lift the bit up during drilling to allow the glass dust that is created to escape the hole. I lift the bit every 3-4 seconds. This is where a drill press comes in handy as you can keep your drill hole very straight. Change your water often as it will cloud with the glass dust.
ALWAYS DRILL GLASS, SHELLS & ROCKS UNDER WATER.
To ensure success you need to drill the glass from both sides. Drill halfway through one side then turn the glass over line up the bit to the hole and drill from the other side. You don’t have to drill all the way through again, only until the bit drills through and creates the hole. You will develop an ear and be able to hear when this happens. I have a lot of light at my drill station so it’s easy to see to line up the bit to drill through again.
Never drill a piece of glass without putting a pencil mark on it first. That way the hole is exactly where you want it to be.
Keeping your drill speed around 15,000 – 17,000 rpm will help extend the life of your bit.
REMEMBER WATER AND ELECTRICITY DON’T MIX. ALWAYS USE CAUTION TO KEEP THE BODY OF THE DRILL DRY!
Drilling expertise will come with experience. Take your time, raise your drill bit often, make sure your diamond drill is sharp! Do your learning on junk pieces of glass. If the piece is large enough you may be able to drill 4 or 5 holes through it. When you have to apply pressure to the bit it’s time to change it. Good luck and hope this helped!
If you are reading this post you’re a sea glass lover. So it’s only natural that you’d understand my excitement when I found this beautiful piece of art glass on a recent sea glassing adventure.
It wasn’t waiting for me like some pieces are, just lying on the sand on the beach or on the rocks waiting to be picked up, I was doing a little bit of digging when I found this.