Someone asked me the other day what the most important tool on my workbench was. I laughed and said “my brain” then I said “my hands”. No she said, she meant an actual tool. That took a little bit of thought. I have many different tools, wire cutters, many different types of pliers, curved, flat and round nose, a few pairs with plastic heads, several pair of crimpers, a bead reamer, as well as a few tools that I’m not even sure of the name of. Some I use many times a day, some not as often.
There are lots of great videos online that show you the basics of drilling sea glass, but nothing teaches you quite like experience. Time spent drilling is what helps us each find the way that is most comfortable for us.
I have drilled thousands of pieces of sea glass over the past twelve years to create my sea glass snowflakes and my sea glass jewelry. I always take care with each and every piece.
How to drill sea glass
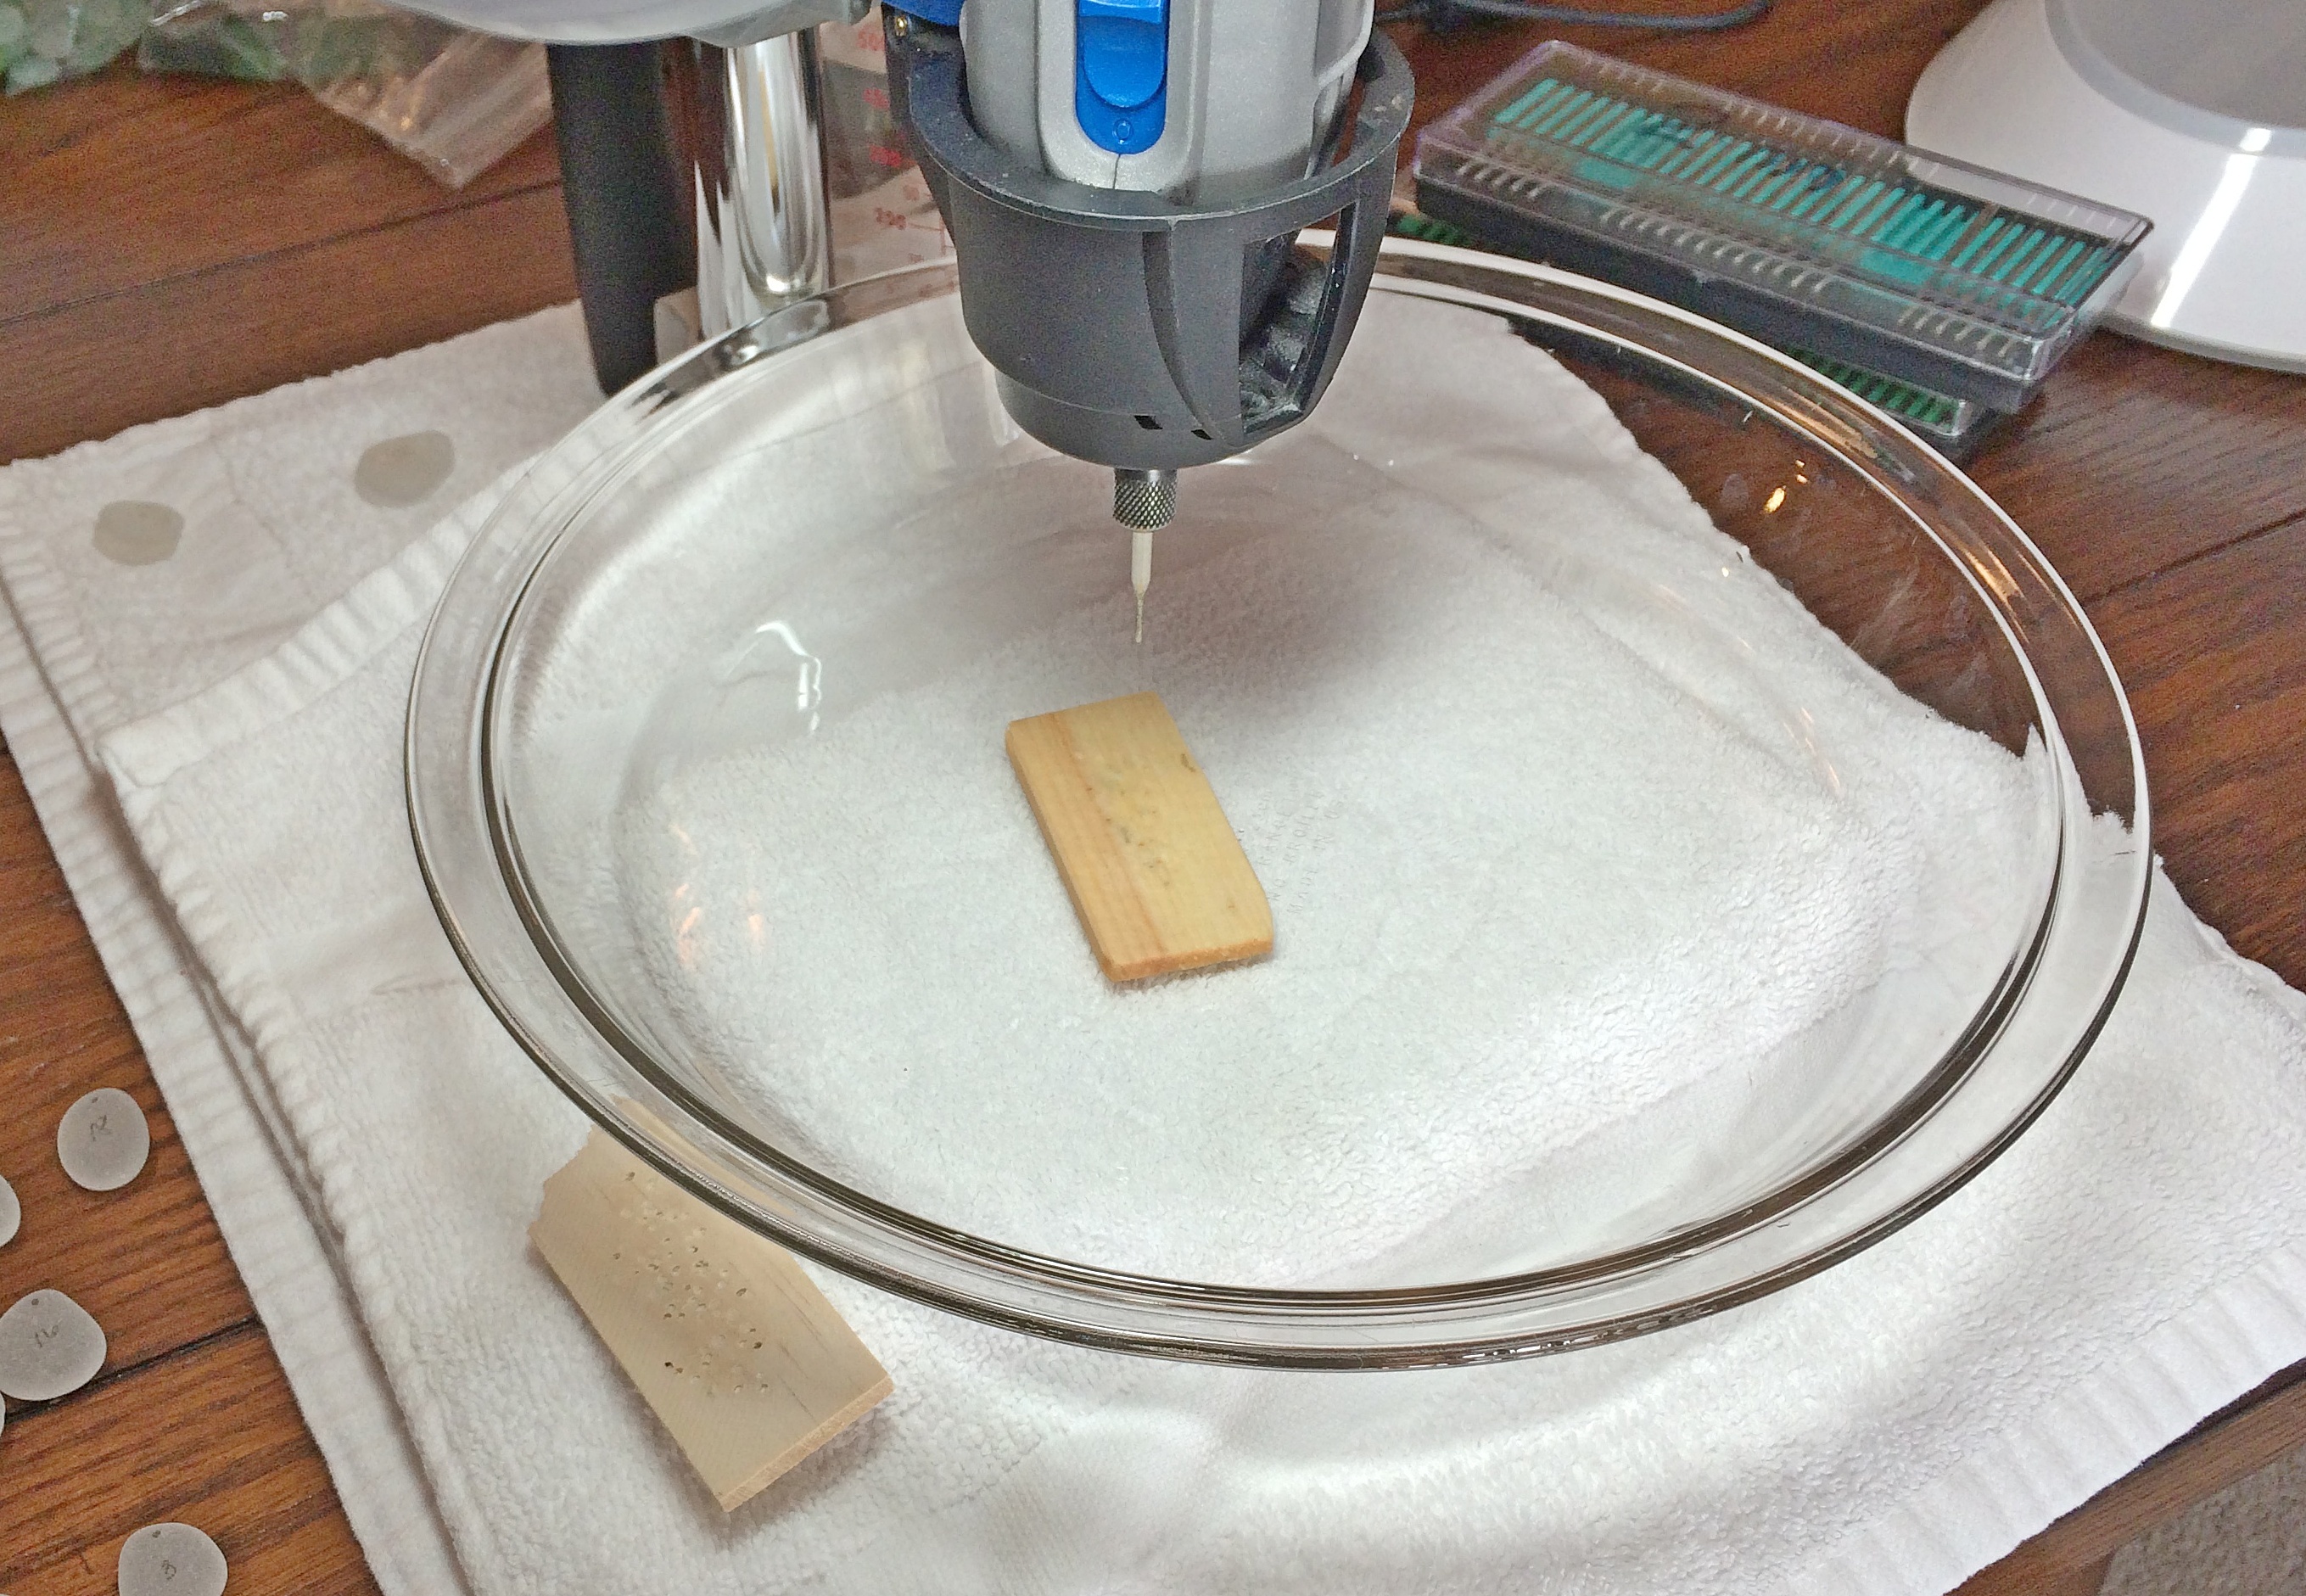
I use a Dremel 4000 drill on a Dremel 220 Workstation (drill press). I can’t imagine drilling without a press. It’s easy to maintain light even pressure with a press and keep your hole straight, which is very important because you are going to be drilling half way through your glass and turning it over to finish the hole from the other side.
As you see from the picture of my drill and press I have a lot of light at my drill station. I use a a shallow clear pyrex dish to drill in which allows the maximum amount of light around the glass and white cloths under the dish to reflect more light.
I have found a paint stir stick to be perfect support for the glass. If I have a piece of sea glass that is a bit rounded that doesn’t sit flat I figure out the best way to firmly seat it against the wood so it’s secure before I drill. Sometimes this means that it’s halfway on and halfway off the wood, but the area I am drilling always sits firmly on the wood.
You may think you don’t need a drill press if you are only drilling very thin sea glass, but even thin sea glass can be a challenge to drill. I have found that some of the thin brown sea glass I find locally can be very challenging to drill because of the density of the glass.
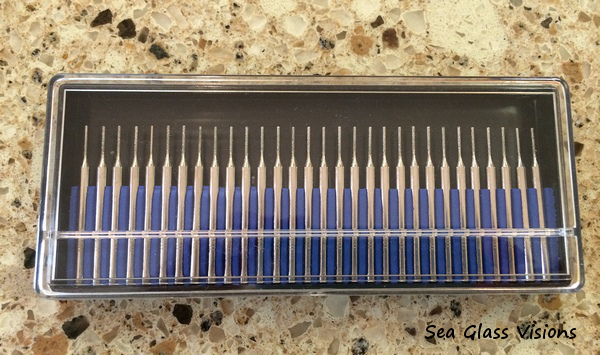
The next item of importance is the drill bit. You will need to use a diamond bit for glass. If you are like me and buy some of the pieces of sea glass you will be drilling the last thing you want to do is ruin your investment due to a cheap or dull bit. A quality drill bit is your best friend. I’d suggest you spend a bit of money and buy quality bits from sellers like RioGrande, especially if you’re just starting out.
Avoid the 30 bit sets you see for cheap on Amazon. I used them in the past and always found 8 to 10 of them did not work at all or did not drill many pieces before becoming dull because they have a very thin diamond coating. It’s difficult learning how to drill and a low quality bit will only make it harder.
My favorite type of bit is a diamond twist drill and I use a 1.4 mm for most of my drilling as 20 gauge wire fits through it easily. I purchase them thru RioGrande.
ALWAYS WEAR EYE PROTECTION.
In order to help keep the glass cool and the dust down you need to drill the glass under water. The water doesn’t have to be deep, as I have learned deep water can alter the view of the glass. The glass needs to be covered. Place your fingers comfortably on the glass to hold it down while you drill. You will need to lift the bit up during drilling to allow the glass dust that is created to escape the hole. I lift the bit every 3-4 seconds. This is where a drill press comes in handy as you can keep your drill hole very straight. Change your water often as it will cloud with the glass dust.
ALWAYS DRILL GLASS, SHELLS & ROCKS UNDER WATER.
To ensure success you need to drill the glass from both sides. Drill halfway through one side then turn the glass over line up the bit to the hole and drill from the other side. You don’t have to drill all the way through again, only until the bit drills through and creates the hole. You will develop an ear and be able to hear when this happens. I have a lot of light at my drill station so it’s easy to see to line up the bit to drill through again.
Never drill a piece of glass without putting a pencil mark on it first. That way the hole is exactly where you want it to be.
Keeping your drill speed around 15,000 – 17,000 rpm will help extend the life of your bit.
REMEMBER WATER AND ELECTRICITY DON’T MIX. ALWAYS USE CAUTION TO KEEP THE BODY OF THE DRILL DRY!
Drilling expertise will come with experience. Take your time, raise your drill bit often, make sure your diamond drill is sharp! Do your learning on junk pieces of glass. If the piece is large enough you may be able to drill 4 or 5 holes through it. When you have to apply pressure to the bit it’s time to change it. Good luck and hope this helped!